


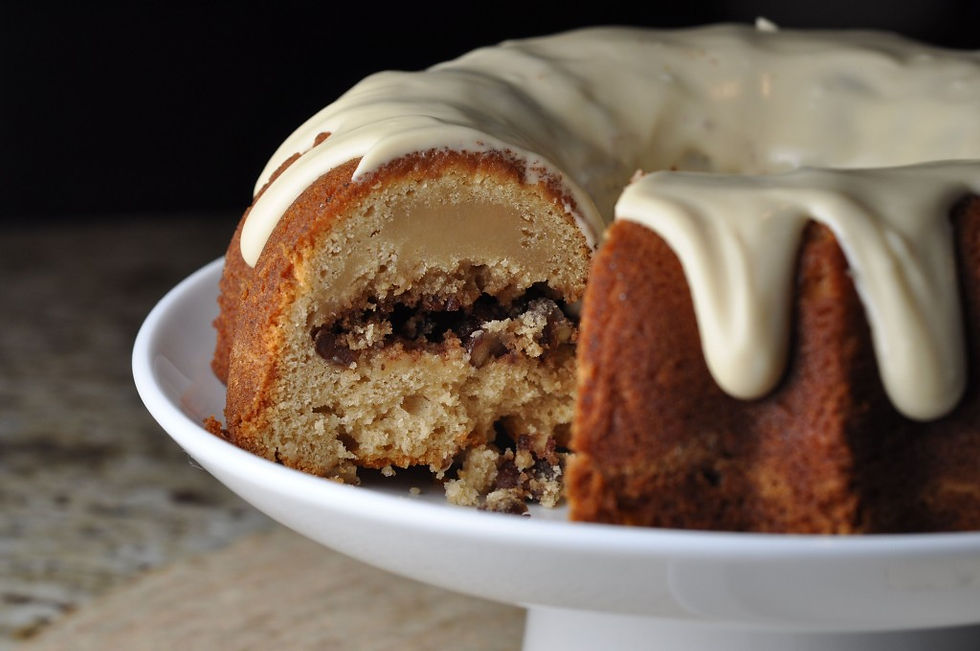
8 Most Common Baking Mistakes and How to Avoid Them
- Aug 19, 2015
- 7 min read

Welcome to Quinn's Cakes first blog post!
This is meant to be a fun, learning environment for anyone, beginners to experts. All kinds of tips, tricks, and advice can be found here. Looking for ideas? Check out our how-to's. Coming Soon!
Have an idea? Submit your suggestions and we will gladly consider them. Don't forget to check back regularly to see if your idea made it into the blog!
To start this off right, we are going to discuss the 8 most common errors people make when baking. So many things can go wrong when trying to create the perfect baked good. Baking is a science and should be treated as such to ensure success.
1. Not Preheating Your Oven
This is such an important step, whether you are following a recipe of your own or someone else's. Baking times are based off the temperature of your oven and the time the product is in the oven for at that specified temperature. Simply turning on your oven when it's time to bake and throwing the item into the cold oven will greatly affect how long your baked goods take to bake and how they bake. I have made a habit of turning on my oven before I even start mixing my batter to ensure that the temperature is accurate when I'm ready to bake.
2. Not Knowing Your Oven
Just because it's set at 350° doesn't mean it's actually 350°. The best way to fix this is to use an oven thermometer. This will tell you what temperature your oven actually is so you can adjust for the discrepancies. Whether your temperature is accurate or not, you also have to watch out for hotspots. The best way to test this is to do a bread test. Take a baking sheet and line it in bread slices. Place it in a hot oven to see what edges or pieces darken. This will tell you where the hotspots in your oven are.
3. Not Measuring Properly
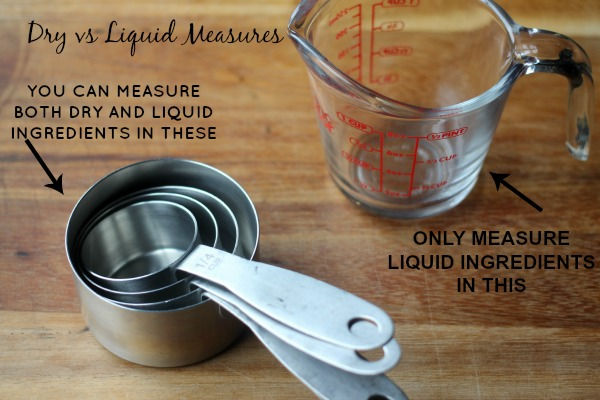
Measuring your ingredients properly is so very important to the baking process. Everything else could be perfect but if your ingredients aren't accurate, your item won't bake right or taste right. First, DO NOT USE THE SAME MEASURING CUPS FOR WET AND DRY! There is a reason why there are wet measuring cups and dry measuring cups.
Dry measuring cups are usually metal or plastic, have a handle with a flat top, and come in multiples of 1 cup, 1/2 cup, 1/3 cup, 1/4 cup, and 1/8 cup.
Wet measuring cups are usually glass or plastic, transparent, and have a spout for pouring.
The reason you can't interchange these for baking is because you can't properly level dry ingredients. If you measure flour in a dry measuring cup, you can scrape the top flat with a knife. If you then dump that same flour into the wet measure cup, it won't read exactly 1 cup. This is because the flour is no longer compacted; air has been introduced and you can't get a flat top inside the wet measure cup. However, wet ingredients can be measured in both the wet and dry measuring cups. Wet ingredients don't need leveling. Always use dry measuring cups for dry ingredients.
4. Under- or Over-Mixing Your Batter
Both can result in damaged goods. When adding your ingredients to your bowl or mixer, always follow the recommended order in your recipe. If the recipe says to sift your dry ingredients, sift them. If it says alternated dry and wet, alternate them. Once everything is in the bowl, mix only until everything is incorporated unless otherwise instructed. I have a recipe that call for mixing the batter at least 10 minutes on medium speed. If you can still see lumps in your batter, continue to mix. Under-mixing and leaving lumps will result in dry chunks in your finished product. If you don't see lumps anymore, TURN OFF THE MIXER! Over-mixing can incorporate too much air so when you remove your item from the oven, it can fall leaving a cavity in your cake or cupcakes.
5. Don't Forget to Butter and Flour or Line Your Pan!
Ok, you've checked and preheated your oven, you've mixed your batter; so now you're ready to pour it into a pan and bake it, right? Wrong! Non-stick pans aren't fool-proof. Always butter and flour your pan, line your pan, or both!
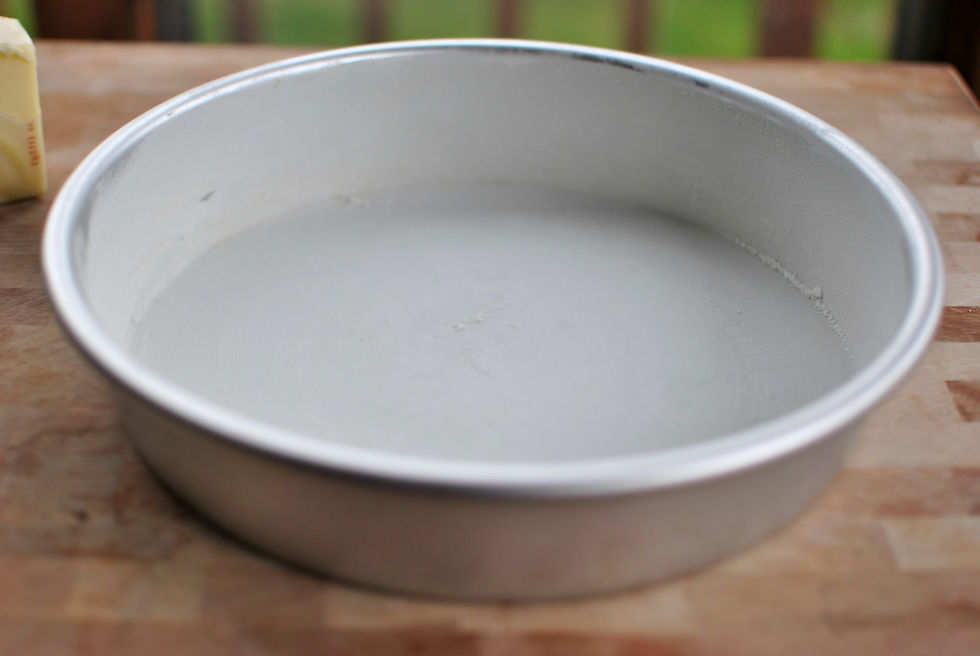
Personally, I always butter and flour my pans. I take a cold (not frozen) butter stick and open just the end. I run it all over the inside of the pan to coat it, making sure to get the creases and corners really good. Then put a tablespoon of flour in the pan and roll the pan around to cover the butter, making sure not to dump it out. When it's coated, knock the pans edge on the counter to knock any chunks of flour out and dump the remaining flour in the trash. This gives you an even coating so you don't have flour chunks on your cake. I prefer this method over lining because lining can take time to get it right. Any mistakes in the folds or shaping and you have baking paper into your cake or have weird creases in your cake.
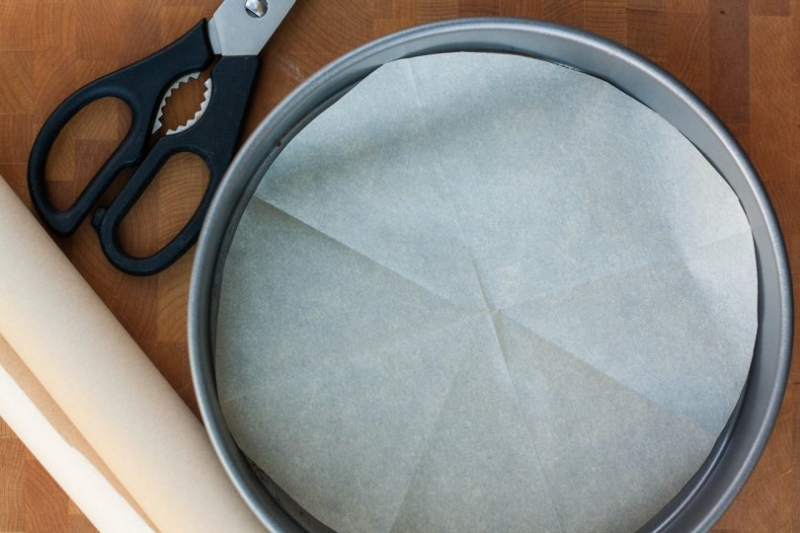
If you prefer lining, parchment paper is ideal. Lining is great because if it's done right, your cake will come out of the pan perfectly every time. To line a pan properly, it's best to spray your pan with baking spray first. Cut out the shape of your pan on parchment paper. This will cover the bottom of the pan. Next, cut a strip of parchment paper out that's at least the same height as your pan or higher. If your pan is square, you can do one strip, two strips, or all four sides separately. Don't worry about them falling, that's what the spray is for. If your pan is round, try to do it in one strip or overlap the edges if you have multiple pieces. Spray the parchment again with the baking spray so your cake will separate from the parchment paper. Whatever you choose, don't forget this step.
Parchment lining allows you to remove your cake from the pan anytime after baking. If you use the butter and flour method, it's best to remove the cake when the pan is still warm but cool enough to handle. At this time, the butter hasn't re-solidified and the cake will easily slip out of the pan without burning you.
6. Over-Crowding Your Oven
Even if you have preheated your oven long enough and you know your oven is accurate, over-crowding can be extremely damaging to your baked items. Trying to fit too much in the oven at once will greatly affect how your items bake and how long it takes to bake. Think of it like putting ice into hot coffee. One ice cube won't do much to the temperature and will melt quickly but if you put three or four ice cubes in a cup of coffee at once, the coffee becomes cold and the ice stops melting. Your oven is similar to the cup of coffee. Too much at once will greatly lower the temperature and the oven has to play catch up. Be patient, try to stick to only one batch at a time and each will be consistent with the last.
7. How Long Should I Bake It?
Baking times can be tricky. The item says 20-30 minutes so which is right? Both! A general rule of thumb for setting your timer is always starting low. Recipes have a time range because everyone's conditions are different. Oven accuracy, altitude, humidity, and external temperatures all play a part in successful baking. Always start at the lowest time suggested. If your toothpick doesn't come out clean after that, increase your time by 5 minute increments until it's done. Don't open your oven during that first setting. Opening your oven affects the temperature so leave it alone. For example, I would set the timer to 20 minutes for a recommendation of 20-30 minutes. I will not open the oven until those 20 minutes are up. After that, I will only open the oven to check the cake every 5 minutes.
8. Over-Baking or Under-Baking
The last and most common error people make when baking is under-baking or over-baking. Either they become impatient and pull the item out of the oven too soon or they set the timer at the highest time to make sure it's done. You've done everything else right and you just want to eat your dessert. I get it but don't give up yet. You don't want to ruin all the hard work you've already done. There is a fine line between under-baking and over-baking. It takes some practice to recognize the signs of both.

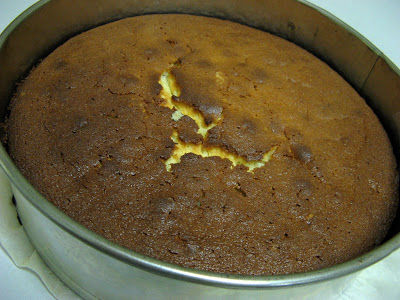
Under-baking is the harder of the two to recognize. It's easy to assume that baking your cake for less time will make it moister and to a degree, that's right. When you go to check your cake after your timer has gone off, you stick your toothpick in the cake and pull it. There are some gooey cake chunks on it at the bottom but it's clean on the top half. It must be done, right? Not quite. Just because some of the cake looks baked doesn't mean the rest is. When you cut into the cake, you'll see some of the cake looks almost like play-doh. This isn't a moist cake; it's an under-baked cake.

Over-baking is harder to recognize because the toothpick will always come out clean. It's how much the cake responds to pressure that tells you how done or over-baked it is. This is why I always start at the lowest recommended time and work up in 5 minute increments. You want to remove the item from the oven as soon as you see a clean toothpick. You know your cake is over-baked when you check it and rather than the cake squishing a little bit when you but the toothpick in, it keeps its shape. The top of the cake has become a hard crust and won't respond like a sponge. Your cake should always squish like a sponge and your toothpick come out clean.
Under-Baked
Over-Baked
Baking can be a daunting task but with preparation and patience, it can be fun and rewarding. If you avoid these mistakes, you'll be successful every time!


Comments