


Disney Mickey & Minnie Chocolate Apples
- Sep 3, 2015
- 5 min read
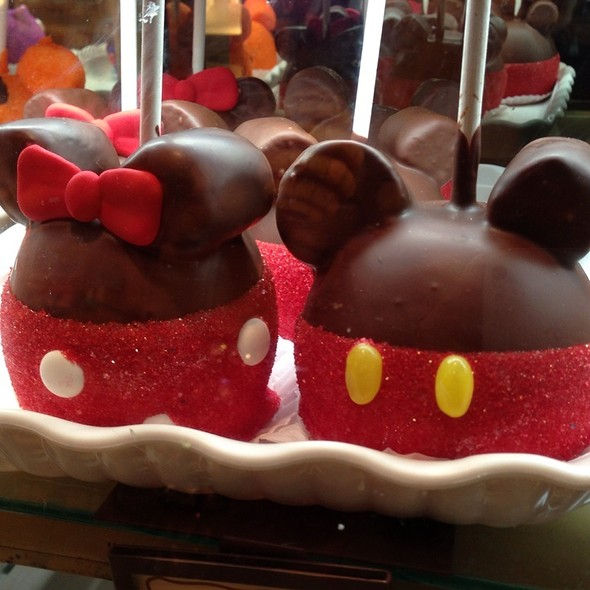
These delicious chocolate-covered apples are a classic treat for anyone that loves Disney or has been to a Disney Park. For those of you who don't know me personally, I love Disney. It's magical! Part of the fun of visiting Disney World is getting to try all the delicious food and treats they have to offer. Well, now we don't have to wait until our next vacation! We can have it right in our own kitchen.
What You'll Need:
6 large granny smith apples
6 white cupcake papers
6 yellow jelly beans
12 large marshmallows
18 white chocolate chips
6 wooden candy apple sticks
2 bags caramel melts
2 bags brown chocolate candy melts
1 bag red candy melts
Red sugar crystal sprinkles (for 6 apples)
3 red tootsie frooties
12 toothpicks
Kitchen scissors
2 ladles or large spoons
Wax paper
Cookie sheet
4 medium bowls
Optional: white candy melts
Bow mold (link below)
1 cup Crisco
Step 1: Preparing Apples
To get the 6 apples ready for dipping, there are a few things we have to do first. To start, remove the stems at the top of the apples. To do this, grab the stem as close to the apple with your thumb and forefinger and twist. The goal is to remove all of the stem. Next, check the bottoms of the apples and trim away any fuzzy foliage around the base. We want these apples as clean as possible. Finally, wash the apples really good in cold water and let them completely dry before moving on. Any water leaking out of the top or bottom of the apples will cause our chocolate to clump. When they are dry, take your apple sticks and spear them through the top of the apple where the stem was until you've gone about 2 inches. You are now ready to move on.
Step 2: To Dip or Not to Dip?
That is the question. Dipping caramel can be fun or a complete mess. For those of us who enjoy doing everything ourselves, dipping our own caramel apples is a must. Some of us don't have the time or want to go through this extra process. If you fall in that category, you can purchase pre-dipped caramel apples and move onto the next step.

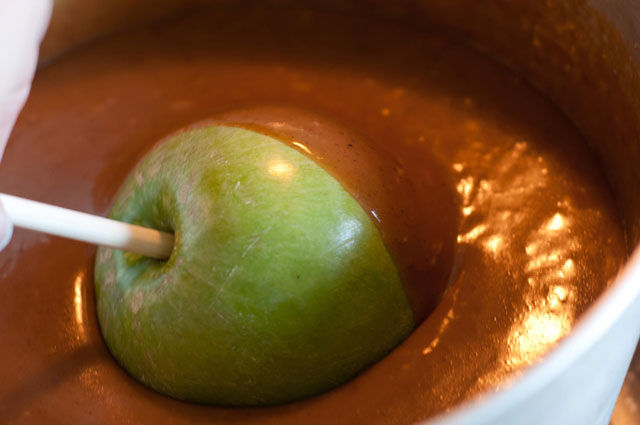
To dip your caramel apples, start by preparing a cookie sheet lined with wax paper. Take one of your medium bowls and dump one bag of caramels in it. It's better to work in small batches so the caramel doesn't harden on you while you are trying to dip. Melt the caramels in 30 second increments, stirring each time so it doesn't burn. When the caramel is smooth and completely melted, you're ready to dip. Start by holding the end of the stick, slowly spinning the apple as you dip the apple into the caramel. You want the caramel to come up to the stick, covering the apple completely. Continue to spin the apple as you remove it from the caramel, gently tapping your hand holding the apple with the other hand, to remove excess. Place the apple on the wax paper and place in fridge to harden. It's best to dip your apples the night before.
Step 3: Creating the Iconic Ears
Now we are ready to create the ears.
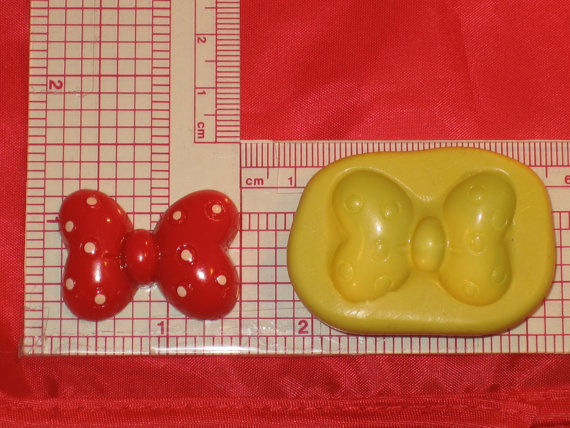
For the bows, they are so easy to make! The link to the Minnie bow mold I used is here. It's from a seller on Etsy and was pretty inexpensive. I used red tootsie frooties for the bows. You could also use molding chocolate or fondant. Press the tootsie frootie into the mold until it's completely filled. Gently peel the silicone mold back to remove the bow. I took a pair of kitchen scissors and trimmed the extra candy from around the bow. We only need three bows. The mold I used has polka dots. If you wanted to add a little extra detail, you could always take a little of your white candy melts and melt them. Then, with a small paintbrush, dab the white chocolate on the polka dots.
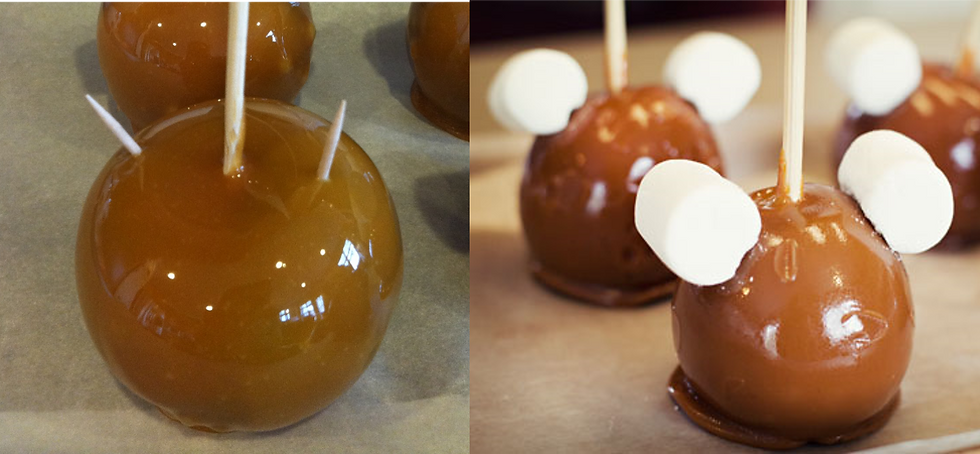
Set the bows aside and grab your marshmallows, scissors, and toothpicks. Take two toothpicks and stick them into the apple at the top, on either side of the stick. This is going to hold your ears in place. With your scissors, flatten one side of your marshmallows so they lay flat on your apples. Put the marshmallow rounds on the toothpicks with the round ends facing forward. Make sure your toothpicks aren't sticking out of the marshmallows. Place the apples back into the fridge while you prepare the candy melts.
Step 4: Dipping the Apples in Chocolate
Once all of your apples have ears, it's time to start dipping. I prefer to use the brown candy melts for this because I like the finish. When dealing in melted chocolate, you have to temper it to get a smooth, shiny finish. When you use candy melts, there is no need to temper. Begin by microwaving the candy melts in a bowl in 30 second increments. Once they are smooth and completely melted, I like to add a little bit of Crisco to the candy melts to thin it out. Start with a tablespoon at a time until the candy is thin enough to just coat the back of a spoon. If you choose to use real chocolate, follow the same instructions to melt the chocolate but leave out about a ¼ cup of chocolate. Once the chocolate is melted and smooth, add the rest of the chocolate and mix until it's all melted. Then follow the same instructions to add the Crisco.
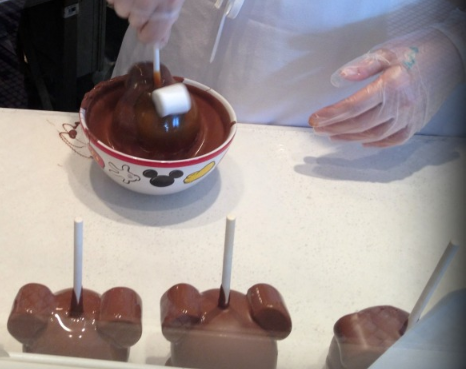
Start by tipping the bowl with one hand while holding the apple with the other. Begin rolling the apples in the chocolate, making sure to coat the ears. You want the chocolate to cover the caramel completely. A ladle can be helpful here if your bowl isn't deep enough. Holding the apple stick with one hand, gently tap your wrist with your other hand while spinning the apple to knock off the excess chocolate. As you finish each apple, place them back onto the cookie sheet. Once they are all done, put them back in the fridge to harden.
Step 5: Time to Decorate!

Finally, we can decorate these adorable apples. Begin by pouring your red sugar crystal sprinkles into a bowl. Next, melt your white candy melts in 30 second increments in your microwave until they are smooth and completely melted. Add a tablespoon of Crisco at a time until the candy is thin enough to coat the back of a spoon. Grab your cupcake papers and separate them. Dip the bottom half of your apples into the white candy melts. Let the excess drip off until it stops. While the candy is still melted, hold your apple over the bowl with the sprinkles. Using the spoon or ladle, pour the red sprinkles onto the white candy until it's completely covered. Set each apple on a cupcake paper and place back in the fridge to harden.

Grab your jelly beans, white chocolate chips, and bows. Be sure to leave the apples on the cupcake papers while decorating. Using some of the white candy melts as glue, dab a little on the back of the bows and place them centered up against the ears. Then attach two yellow jelly beans on each of the three Mickey apples. Place them on the front of Mickey's pants. Finally, space six white chocolate chips around Minnie's skirt. Alternate placing one toward the top of Minnie's skirt and toward the bottom.
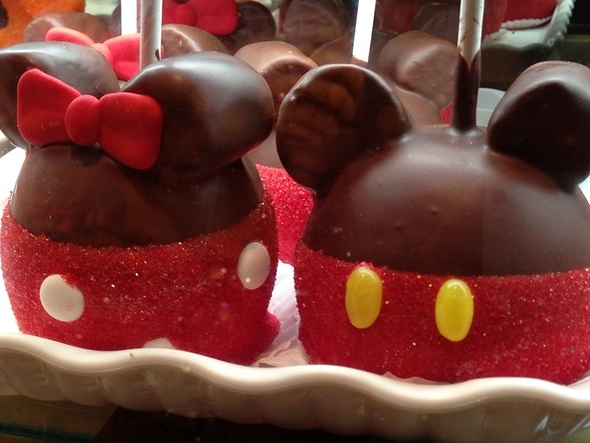
We no longer have to wait to go to Disney World to get these adorable, iconic apples. Now you can create Disney magic right in your own kitchen!


Comments